|
The iPhone Wiki is no longer updated. Visit this article on The Apple Wiki for current information. |
Apple Watch Update Utility
This article discusses software internally used by Apple. Acquiring a copy without Apple's consent is illegal and may result in being scammed. |
 | |
|---|---|
 Apple Watch Update Utility's new (top) and old (bottom) icons. | |
| Original author(s) | Apple Inc. |
| Developer(s) | Apple Inc. |
| Stable release |
2.0.1 (latest known version) |
| Operating system | macOS |
| Available in | English |
| Type | Firmware updating |
| License | Closed source |
Contents
Summary
Apple Watch Update Utility is a retail application used for updating the Demo Content on special-purpose Apple Watch units. It has support for Touch & Try, MTI 3.0 Watch Display, and Table Display units, and requires macOS Sierra or later, iTunes 12.7.1 or later, and at least 10 gigabytes of free space. Demo units must have at least 50% charge before initiating an update or restore.
Touch & Try Units
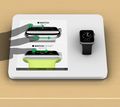
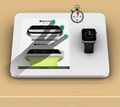
Touch & Try units are demo Watches prepared for use on a customer's wrist. They are essentially the equivalent of unsecured iPhone, iPad, and iPod demo units. In the store, they rest in pairs on white charging pads, and are free to be picked up and put on. When being serviced, Touch & Try units must be connected to a host Mac with the Touch & Try software dock.
In order to connect the software dock, remove any attached bands. Stick a needle or other pointed object into the ejection mechanism for the Watch's six-pin diagnostic connector, located inside of the bottom band slot (similar to a SIM card tray). Make sure you do not misplace the diagnostic port cover, as it is very small, and losing it may risk debris obstructing some of the contact points. Once the contact points are exposed, slide the Watch onto the software dock as if it were a band. To lock it in place, slide the white switch up. This will raise the pins on the dock and connect it to the diagnostic port. Finally, attach a standard Lightning cable to the bottom of the software dock and to the host Mac.
MTI 3.0 Watch Display Units
MTI 3.0 Watch Display units are demo Watches meant to be displayed and used in a fixed position. While on the sales floor, these units cannot be moved unless they are to be serviced by a retail employee. They are secured to white display stands manufactured by Mobile Technologies, Inc. that mimic a silicone Watch band to mask the diagnostic connector underneath. When serviced, the top of the display stand can be detached to expose a standard lightning port.
Display Table Units
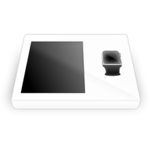
Perhaps the most unique device ever manufactured by Apple is the Display Table demo unit. The now retired Display Table unit was a glossy white slab with a Retina display on the left and a fixed Apple Watch demo unit attached on the right. Inside the Display Table unit was a modified iPad-type device that monitored to use of the demo Watch and displayed relevant information on how to use it. For example, opening the Messages app on the Apple Watch would cause the display to show how to share your heartbeat with a recipient, among other features. The display was powered by the Apple Watch Demo app (codename Hogwallop), which is also retired, and was able to monitor and troubleshoot the Display Table unit and connected Apple Watch.
There were two variants of the unit, one battery-powered, and one wall-powered. Both variants can be powered by an 85-watt MagSafe 2 connector, presumably on the underside of the unit.
To service the Display Table unit, the unit was detached from the demo surface and taken backstage. It featured a lightning connector on the rear so it could be attached to a host Mac via a standard lighting connector.
Due to the difficulty of removing some units from the demo surface, the Apple Watch Demo app featured integrated troubleshooting tools that allowed for quick fixes on the sales floor. To access the Quick View screen, an employee could swipe three fingers in from the left edge of the display. To access the Troubleshoot screen, a 5-second, three-finger press in the top right corner of the display was required, along with store credentials.
For more forceful troubleshooting options, employees could use the reset pinhole on the rear of the unit, along with a SIM card tool or other pointed device, to do the following:
- Sleep/Wake the display - Press in once and wait five seconds for the unit to respond.

- Power off the display - Hold in for seven seconds until the "slide to power off" slider appears. The unit should not be connected to power to avoid it powering back on unexpectedly. This does not power off the connected Apple Watch.

- Reboot display and connected Apple Watch - Press in three times within five seconds.

Employees could also reboot the connected Apple Watch without rebooting the integrated display by pressing and holding the digital crown and side button together until it powered off. ![]()
Restore Procedure
Despite what the name may suggest, the Update Utility cannot update the watchOS version of a connected Apple Watch. This job is left to iTunes. To restore Apple Watch, the host Mac must have iTunes 12.7.1 or later. These steps must be followed closely to ensure a successful restore:
- Launch iTunes. Make sure the demo Apple Watch unit is connected to the host Mac, whatever demo model it may be.
- iTunes should display the Apple Watch's information automatically. If it does not, click the Apple Watch icon in the top bar.
- Click on Restore Apple Watch... It is recommended that the Apple Watch be restored every time it is updated to ensure stability.
- Since there is no external update server for Apple Watch IPSWs, select an IPSW for the candidate watchOS version.
- Click Restore and wait for the restore process to finish. During this time, iTunes will verify that the candidate firmware is signed, and restore it to the Watch. This may take up to 15 minutes.
Updating/Installing Demo Content
Once a Watch has been prepared for updating, the Utility can be used to fetch the latest Demo Content. Note that the Update Utility can only update Demo Content on one device at a time, and iTunes must remain open for the entirety of the update process. These steps must be followed closely to ensure a successful content update:
- Launch Apple Watch Update Utility and ensure you have the latest version by opening the "About" menu.
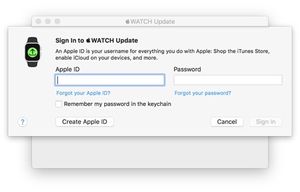
- Enter valid store credentials and click Sign In.
- Select a country from the list and click Next.
- Select your store (or a default store) from the list and click Next.
- Select a Demo Content bundle from the list and click Next.
- With the device attached, select from the Demo Content drop-down:
- Apple WATCH if you are updating a Touch & Try or MTI 3.0 Watch Display unit.
- Table Display if you are updating a Display Table unit.
- Click the Update check box next to the attached device and click Update.
- The Utility will begin downloading the latest Demo Content bundle. A progress bar will show during the download and update process.
- The unit will appear to reboot a few times during the update process. Once it is complete, the unit will reboot once more.
- Once the Utility notifies that the process is complete, safely detach the unit from the host Mac (and software dock if applicable) and configure it via the on-screen setup utility.
Configuring the Demo Unit
With the demo unit properly restored and updated to the latest Demo Content, it can now be configured on-device:
- Select the country/region.
- Select the Demo Mode:
- Wrist Demo if the device is a Touch & Try unit.
- Fixture Demo if the device is a MTI 3.0 Watch Display unit. Note that Watches embedded in Display Table units are automatically configured by the embedded display device.
- Connect to a Wi-Fi network by selecting a network from the list and Scribbling the password (if applicable).
- The unit will now activate. If activation succeeds, configuration is complete. If activation fails, dismiss the error message and retry.
These settings can always be reconfigured by opening the Settings app and accessing the Demo Menu by triple-tapping with two fingers. Make sure to not tap any of the options on-screen.
To reconfigure time and date settings, open the Settings app, select Time, and scroll down with two fingers.
Version History
- 1.0.7
- 1.3
- 2.0
- 2.0.1


