|
The iPhone Wiki is no longer updated. Visit this article on The Apple Wiki for current information. |
25C3 presentation "Hacking the iPhone"
This was a presentation held on the 27 December 2008 at the 25th Chaos Communication Congress (25C3) in Berlin. Speakers were pytey, planetbeing and MuscleNerd.
The presentation explained the inner workings of the iOS architecture, its security, and how it was circumvented. Short event description
During the presentation MuscleNerd wanted to show the video of a live demo of the unlock with (yellowsn0w), but skipped it because of the missing time. This video was actually released some days before.
Contents
Conference Recordings
- Conference recording video on Vimeo
- Conference recording video in H264 or via FTP or torrent link. This version is the best quality available.
- Conference recording video in M4V
- Conference recording as MP3 audio
- Conference recording as OGG audio
- Official download page (look for presentation 2976)
- Official FTP server (look for presentation 2976)
The presentation slides are currently not available. Maybe one of the presentators can upload them here or post a link.
Transcript of the presentation
Start
Good evening everybody. I would like to introduce the iPhone Dev Team who are here to give a talk on iPhone hacking. So if you join me to give a round full of applause please.
Introduction (by pytey)
Good evening ladies and gentlemen. Here’s a little slide show here for you.
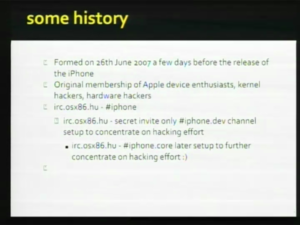
This is a slide called hacking the iPhone. I’ll give a little history here about our little crew.
We formed in June 2007, just before the release of the original iPhone. We’re original hardware hackers and device enthusiasts, based around Apple products and we sort of rather say towards the iPhone as a platform. We exist on IRC. This is the first time most of us have met each other. Originally there was a couple of channels on the osx86.hu server.
We’ve got a wide membership: Germany, Belgium, France, Russia, Hungary, USA, Israel. And during those initial few months of the iPhone first generation DHL and FedEx shipped around a lot of US phones to us.
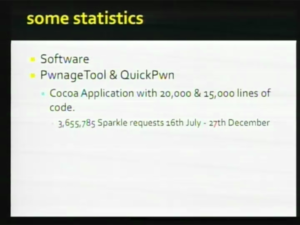
We’ve got some statistics here of our little site. We’ve had about 1.7 million visits in the last month.
Fifty, sixty thousand unique visitors per day and various networks around.
We’ve got a tool called Pwnage tool and another tool called QuickPwn which is viewed here as the next good project.
It’s a Cocoa application. It’s got 20,000 lines of code. QuickPwn has got 15,000 lines of code. There’s also other platforms: Windows and Linux as well. We’ve had 3.6 million Sparkle updates since we last deleted our logs, which was in the 16th of July. We try to release patches when Apple releases an iPhone update.
We try to get patches out 24-48 hours after the release of those updates. And the modular bundle sets for cross-platform use. We use [[[wikipedia:Sparkle (software)|Sparkle]] for updates for the Mac platform, as I mentioned. An interesting lead: There’s a 180 very active users from Apple who update their QuickPwn and Pwnage tool on a regular basis, so I think they like our software, which is pretty cool. Thank you very much Apple. (big applause)
I’ll just introduce my colleagues here. We’ve got bushing on the end. He’s one of the guys. This is MuscleNerd (laughter) - I don’t know why. This is planetbeing. And we’ve got a bunch of other guys here we don’t want to be identified for obvious reasons, but they’re over there wearing Pwn-Apple T-shirts. And they speak Russian. (laughter) Say hi guys! (applause)
So with that further I’ll hand you over to planetbeing who’s gonna talk a bit about the applications processor side of the iPhone. Thanks.
Part 1: Applications Processor (by planetbeing)
So my talk is gonna be about the application’s processor side. That’s the chip that runs the iPhone OS in all the racing car games that you all see in the App Store.
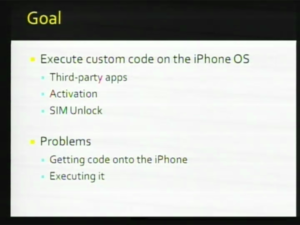
It’s only related to the baseband unlock, because the iPhone has two ARM processors and the baseband modem has one of them and the application processor has the other one, and they’re only loosely connected. Each has their own security framework. My portion of the talk will be focusing on the application processor. And you know our goal is to execute custom code on the iPhone OS.
The purpose of doing so is to launch third-party apps, activation of the iPhone which allows the iPhone OS to recognize unofficial carriers, and it also provides a useful platform for the SIM unlock because then we can use the iPhone OS to directly communicate with the baseband modem. So I’m gonna just go over some of the security framework of the iPhone, and first of all I’m gonna talk about the basic software architecture of the device.
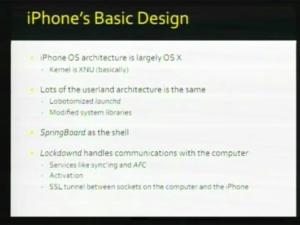
As Apple advertised the iPhone OS architecture is basically Mac OS X. If you look at a disassembly of the kernel, you can see that it’s basically XNU, which is the kernel for the Mac OS, it’s basically XNU code compiled for ARM. A lot of the userland architecture is also the same. There is launchd, which is the Mac OS version of init like Linux is init. It’s a little bit bottomized, there’s no command line switches, but, you know it’s basically the same thing, have launch daemons and everything else. System libraries are slightly modified, but they’re pretty much the same as on a typical OS X Mac machine. So instead of the Finder you have SpringBoard as the shell. One important difference between the Mac version of OS X and the iPhone OS is that there’s an additional daemon called lockdownd, and it handles communications with the computer. It basically is the gateway between the computer and the iPhone over the USB cable. It multiplexes the USB connections and it establishes an SSL [[wikipedia:Tunneling protocol|tunnel] between a socket on the computer and on the iPhone. It’s basically like inetd. You can have different services that lockdownd activates. Services like MobileSync, MobileBackup and a rather important one for our purposes is called AFC, which allows the computer to access a small jailed portion to the file system. So our goal here is to sort of subvert this and to modify the operating system, so that we can run our own code. How do we do this?
The iPhone OS primarily runs on a NAND flash disk. To userland it appears as a normal block device. So if you’re familiar with the Mac OS terminology, it’s under /dev/rdisk0s1 /dev/rdisk0s2. There’s two logical partitions on a NAND drive. There’s a system partition, which is mounted at root, and there’s a user partition. The system partition is read-only, and these are only logical partitions, and they sit on top of an FTL which convert the logical partitions which are better suited for traditional disk drives to NAND flash geometries, which, you know, have peculiar things, like be only able to erase a block at a time.
Here is how the iPhone OS is protected.
Third-party applications and everything else that’s modifiable on the iPhone OS are installed on the user partition. The system partition is read-only, so in case the iPhone crashes you don’t have to recheck the system partition for file system integrity. Every program, every executable on the iPhone is signature-checked when the system call execv is executed on that. All executables must be signed by Apple and the signatures and the hashes are stored in the mark-up format as segments and because the signatures are only checked when the program starts you can still use code execution if you have a buffer overflow or a stack overflow, but the limitations of that is that all the applications like MobileSafari or MobileMail and everything else run as a mobile user, so they can’t really alter the operating system. The signature-checks are implemented inside the kernel. So in order to do our thing, in order to run third-party applications, we have to modify the kernel. Here is how the kernel is protected.
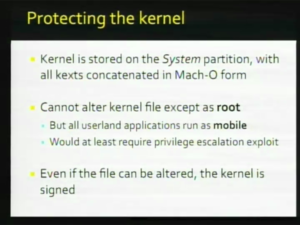
The kernel is stored on the system partition, which again is mounted read-only. It’s a big binary blob with the kernel and all the kernel extensions, KEXTs, which basically provide driver functionality for Mac OS X and they are all concatenated together and compressed with LZSS and encrypted and signed. And you can’t alter this kernelcache, except as root. So even if you got a code execution, you still need a privilege escalation exploit as well in order to modify this file. And even if you could do that, the kernelcache is signed, so if you modify it, your system will stop booting. So, to get around that, we need to look at how the signature for the kernel is checked. And I’m only just take briefly take you to the boot process for the iPhone.
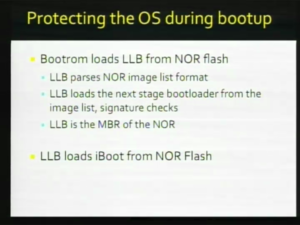
The first piece of code that’s loaded on the iPhone is the bootrom. It’s Secure-Boot as Apple’s terminology is. I mean it’s kind of a lie as you find out later. So the first thing that it does is it loads from NOR flash a program called LLB. The NOR flash supplements the NAND flash. It’s just an 8 megabit NOR flash and it serves as the NVRAM for the OS which concludes [[wikipedia:Kernel panic|kernel panic] logs, bootloader variables. It also has a file system, or a kind of a rudimentary one; a list of images that contain the bootloaders themselves. So the LLB is, like the way I put it, is that it’s the MBR for the NOR, which it does the same thing that the MBR does on like an x86 machine. It reads the image-less format and it loads the next-stage bootloader from the image list, signature-checking it first before executing it.
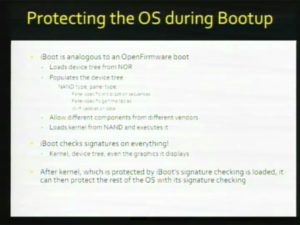
The next stage in the boot process after LLB is iBoot, which is loaded from the image list. If you’re familiar at all with the Mac boot process, iBoot is an analogous to Open Firmware. On a Mac machine, instead of the kernel probing devices and discovering what hardware is there, the bootloader provides the kernel with the DeviceTree which has all this information already included. And iBoot loads the DeviceTree from the NOR. The DeviceTree - there’s one for each different type of platform, one for the iPhone, one for the iPhone 3G and one for the iPod touch. And this DeviceTree is only partially populated. There’s still some device-specific things, like the serial number that must be added by iBoot. Also Apple uses different components from different vendors in their manufacturing process. There’ll be like a few different types of LCD panels that they use and a few different types of NAND chips from different vendors, and some of them have their own initialization sequences. Instead of having the kernel do that, iBoot actually does that, which makes the kernel more flexible. So it populates the DeviceTree with gamma tables, Wi-Fi calibration data, it does all of that. And then finally it loads the kernel from NAND and executes it. The thing here is that iBoot checks signatures on everything. It checks signatures on the kernel, it checks signatures on the DeviceTree, and even the boot logo and graphics that it displays. So we need to get around this in order to do our eventual goal of running unsigned applications on the iPhone. And the whole structure works like this. You have this whole chain that signature-checks the kernel and then the kernel signature-checks all the userland applications.
So there’s one slight problem with this scheme. We know that userland applications are signature-checked by the kernel, which is good. And the kernel is signature-checked by iBoot, so that’s good. iBoot is signature-checked by the LLB. OK. But is the LLB signature-checked by the bootrom? No! So, that’s a big problem. So all we need to do is just flash our own LLB and then patch all the signature-checking on all the subsequent stages and then we can run our own code. This is a little bit easier said than done though. The only way we can flash the NOR is through the restore process and I’ll explain why in a second after I tell you what it is.
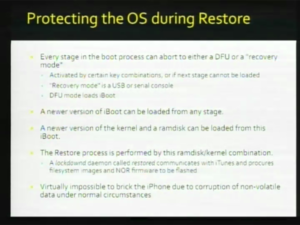
Every stage in the boot process that I described earlier can abort to either a DFU or Recovery Mode, and it’s activated by either keypresses or if the next stage can’t load. Recovery Mode is basically a USB or serial console. It’s a feature of iBoot. And DFU Mode is just a mode where iBoot can be loaded and you can get into Recovery Mode. So the restore process is basically a version of iBoot is loaded- a newer version, the latest one- is loaded by iTunes onto existing version of iBoot or DFU Mode. And then iTunes sends the latest kernel and a Restore ramdisk to this iBoot. And then iBoot boots the kernel from the [[Restore Ramdisk|ramdisk]. The restore process itself is actually conducted by this ramdisk/kernel combination, lockdownd daemon, called restored. The lockdownd thing, as I described, it communicates with iTunes, it downloads of ASR image. I don’t know if you guys know about ASR, but it’s an Apple backup thing. ASR image from iTunes: it also downloads NOR firmware to be flashed. And the good thing about this process is it’s actually very well designed. It’s pretty much impossible to break the iPhone because of this process. Because you can at any point... break the applications processor that is. At any point because you can always bootstrap the restore process like this.
The way that this restore process is protected is that iBoot that’s loaded from any stage is signature-checked before being executed. The ramdisk and kernel is also signature-checked by iBoot, and restored itself signature-checks the ASR image in a NOR firmware and it already sits on a signature checked ramdisk, so itself cannot normally be modified.
Also, everything is encrypted with a key that’s derived from a hardware AES key. This AES key we can’t read it, but the code on the iPhone can use it. These keys are disabled from any boot that’s not from a signed ramdisk. So this means that even if we’re able to find a code execution exploit on a normal boot and have a privilege explanation exploit and communicate with the kernel and tell it to flash the NOR, we still can’t do it, because we’re not in a secure mode. The filesystem itself is encrypted with FileVault and the way that’s done is that FileVault key and also the expected SHA hash of the filesystem is stored on a encrypted ramdisk. And this way everything is encrypted. This makes it difficult for us to do our work, because we can’t read any code and we can’t reverse engineer it. That’s the way that they planned it.
So it still sounds pretty secure. All the modification that this graph shows the modification vectors for every piece of the software that I mentioned. And you see that everything signature-checks everything else pretty much. So, it’s still pretty secure even if the bootrom doesn’t signature-check LLB, as long as you can’t modify the NOR.
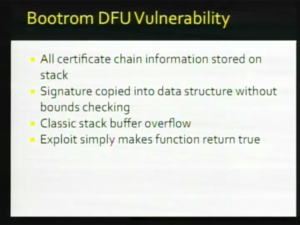
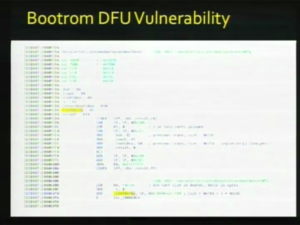
Well, there’s one problem, is that this chain can be broken. And what place we break it is at the bootrom level or where they can’t patch it or fix it in any way. So it’s a pretty much your standard stack overflow exploit. They’re processing certificates which are on a DER format. They copy all the certificate information onto the stack, but the signature itself is copied into this data structure without any sort of bounds checking. So then you have this classic stack buffer overflow and then you just make the signature checking function return true. I was just gonna show you – I probably don’t have enough time to do a very thorough job of this, but basically
this is the function that we want to return true. We want to jump to offset 57EC and make R4=1, because our R4 gets moved into the return value later. CheckCertificateAndGetSecureBootOnes is the function that has the vulnerability. As you can see, in the
highlighted areas it makes space on the stack for three certificate structs. So what you wanna do is construct a certificate DER that’s structured like this. The thing that’s overflowable is MCertSignatureValue, so you have 0x30 bytes of padding at the end of covered the rest of these and then you can start loading the registers with your own exploit values. So 1 for R4, we don’t really care about the other registers.
And the offset 57EC for the PC – for the program counter. So that’s basically our exploit. What we load from this is what we called Pwnage, which is our complete solution as it were.
What we do is we patch every single stage, like where I mentioned all the signature checks, we patch all of those out. And what we do, we patch out in the LLB, iBoot, kernel, the restored on the ramdisk, and on the filesystem image, because we patched out the signature checking on restored, we can put our own sort of App Store for unsigned programs for things that Apple won’t support. And the two most popular ones are Cydia and Installer. We use the DFU exploit to load a version of iBoot that doesn’t perform signature checking and then we use the normal restore process to restore the rest of it; to flash the rest of this onto the iPhone. And what ends up happening is that we can use iTunes to flash our own custom firmware onto the iPhone. So, yeah. (applause)
Just briefly I just mentioned stuff that Apple did wrong, to make the job easier for us and probably the biggest reason is that instead of rolling out all this wonderful security mechanisms at once, they did it piece by piece and they sort of made a few mistakes early on in the process. And by doing so they allow us to get access to pieces of code and we’re able to reverse engineer it and we were able to figure out how it all worked and where the vulnerable points are and how to attack it. One of the early mistakes is in 1.0.2. The iPhone actually trusted iTunes which we can modify easily. At that point we could actually send custom restore commands and jailbreak the iPhone. Another call was none of the executables were signed at that point, so you could make a simple file system alteration and you’re jailbroken.
Another vulnerability in 1.1.1 and 1.1.2 is that everything used to run as root. So if you find a vulnerability within any userland program, then you have root. They also left some interesting things like /dev/kmem which means that we can poke and peek kernel memory and execute kernel code, so that was kinda bad.
And finally probably the mistake that first allowed Pwnage was they left the boot arguments pmd= and vmd= and these boot arguments can construct a ramdisk to boot out of anything. And that basically... not out of anything but out of any contiguous portion of memory. And that allowed us to bootstrap a ramdisk pretty easily, because when we upload a ramdisk, the iPhone has to store in memory somewhere and then signature check and then decide whether it wants it pass on to the kernel based on whether the signature is correct. But even if it fails the signature check, the ramdisk is still in memory, so we can use pmd= or vmd= to construct a ramdisk out of that portion of memory that it temporarily stores or upload in. And then this basically allowed us to boot from an unsigned ramdisk right away. And allow us to flash our first bootloaders. We learn a lot from this process. We now have added quick control over the iPhone’s hardware to even run Linux on it, so that’s basically where we are. I’ll pass it to Musclenerd to describe the Baseband Firmware.
Part 2: Baseband (by MuscleNerd)
(in work by http, will follow here)
End and Q&A
(in work by http, will follow here)
